Wednesday, August 15, 2012

Petal Dress Tutorial!! woop woop

Its been a busy busy month...however my busy bee wings are broken and I feel like sitting in my Jammie's and blogging a bit...first up a wonderful tutorial!!! I wish I could give credit for this however I have no idea who I first learned this from Basically its a skirt tutu turned into a dress!!
The Petal Dress
Sunflower Petal tutu dress tutorial

My lil mistress of mayhem is turning one in a month and I wanted to take special picture to put in her birthday invites.
So I made this so easy absolutely adorable dress!!!! I think the whole dress took maybe half an hour to make!!! The Dress is made out of Tulle (which is very cheap about 1.50 a yard) and is basically a tutu dress!!! I had fun making the dress and even more fun taking the pictures of her! She kept walking towards the camera however I think it showed her...well being her! I love my lil Petal :-)

Sunflower Petal Dress tutu Tutorial page 1

Sunflower Petal Dress Tutu Tutorial page 2

I'm working on the invites now ans I plan to write in them ...Please join us as our little Petal Turns into a Flower!! If you need any help please let me know also let me know if you make one as well I would LOVE to see pictures!!!!!
Happy Crafting!!!
More pictures from that day :-)


Tuesday, July 10, 2012

Tips for mum's 2

Hello all and Happy Tuesday!!
My tips for mum's...and Dad's
This week has some things I have done or I am currently doing...first off and an Idea I am in love with!!!
You simply take an old baby wash bottle  cut a hole in the bottom that's the size of your faucet and cut the top part of the bottle off. Next cut a horse shoe shape out of the back and enjoy! I have a bottle set aside and I plan to do this in the morning I'll post pictures after I have finished :D
Love Love Love this and I have been doing it for a while!
Organize all your instruction booklets from items. Simply put all instructions and warranties along with any other items your may want to save from a product in a three ring binder! Trust me this is the most perfect way to organize all this!
This one blows my mind! Never buy celery again! Did you know that you can grow another complete celery stalk from the bottom piece that you cut off and throw away? I'm actually trying it right now!!! I'll post back in a few weeks on how it is going!! Cut off the end that you would normally “throw away” and then place it in a small dish filled with warm water. Next “pot” the celery stalk (Stalk Side Up) or place in your garden. Just dig a small hole, fill it with water and set the end in the hole, then cover it up with an inch or so of soil. Water thoroughly. That is it! Now the “end” will grow into a full stalk of celery! Rinse and Repeat and you never have to buy celery again! 
This one came in handy tonight! Easy way to remove a splinter! Mistress of mayhem and I both got splinters tonight after a play date in the park...I wasn't so worried about me but Mistress of mayhem was extremely upset about mommy coming at her with a needle....so I looked up easy removal of splinters and found this...and it worked pretty well....apply a paste of baking soda and water, then waiting several minutes for the splinter to pop out of the skin.
Source: wikihow.com via Janna on Pinterest
I hope these little bits of tid bits help you out on your journey through life!!!! again... Happy Tuesday!!!

Tuesday, July 3, 2012

Tips For Mums!!!

I've noticed some interesting and wonderful tips for mums and dad's on the internet and wanted to share some with my readers!

This Idea I’m in love with! How simple! Why are we not all doing this??? So simple just add a curtain rod on the opposite side of the shower... Add shower rings to hold little containers and *Poof* instant shower organization!!


Source: via Janna on Pinterest
This works! I have used it several times for my lil ones and it makes giving any medicine so much easier! Stores have nuk's that hold medicine but they really dont work that great. They are very firm and most lil ones have a hard time sucking on them...I find this works soooo much easier!!!
Source: via Janna on Pinterest

I always disliked the idea of leaving my tooth brush in a cup on the counter. This solves that...pretty simple perfect organization!!
Source: via Janna on Pinterest

Monday, July 2, 2012

Kiwi's

Found a very adorable site I'd like to share with all the mum's n dad's :D
its KiwiCrate.com

Basically for 19.95 a month they send your child a charming green box each month filled with fun theme inspired projects directed at children 3-7 years old! They even have a sibling package for a little more. At first...since I'm a mom on a budget I thought ugh 20 bucks a month.... NO WAY...

However after giving it a little thought 20 bucks a month for a package to come in the mail that my "master of disaster" gets to look forward to along with a cute project that we get to work on together may not be that expensive after all! I'm thinking its a good investment!

Also did I mention it has Kiwi in the name! Only my most favoritist (yes thats a real word) animal ever! I'll have to let you know when we get the first box!

Wednesday, June 20, 2012

Play Kitchen or french toast with shaker cheese!!!!

Growing up my favorite thing that my brother and I played with together was a refurbished play kitchen my grandfather had built out of an old entertainment stand. He used a Pink hospital "puke" basin for the sink in the kitchen and it had simple doors for the fridge. Nothing fancy just simple and it lasted for ever! However being in the military and moving a lot my parents decided to give it away during one of our moves after us kids out grew it...Understandably however  I still miss it.

Several months back I noticed on pinterest an old T.V. stand that was turned into a play kitchen and instantly I knew I had to build one for my kids.

I found two blogs both with kitchens that I love!!!!! Both blogs have picture tutorials as well.
Giggleberry creations and Freshcutflours

I already had lots of white paint so I decided in an attempt to keep it cheap I would paint it white...however I am in LOVE with Fresh cut flowers red version!!!!

I started with an old TV stand made out of oak
I added Some doors..reused the old hinges and moved the
wall over for the fridge and Oven. Cutting out the sink was fun...
I found I can not cut a circle that well lol


Some Paint decorations and done!!! I plan to add more accessories to
 it later I want to add a dry erase board to the fridge and a few other things!

My Master Of Disaster making me french toast with shaker
 cheese lol YUMMY!!!

Over all it took a couple days only a few bucks and my kids play with it EVERY DAY!!!
Time well spent!!!! 


Tuesday, June 19, 2012

Handmade over Walmart!


In a couple weeks my little boy will be three!

I know this not only because I gave birth to him, but because every day for the past couple of weeks he wakes up, goes to the calendar and counts down until he gets his monster truck birthday cake. (this is very important to him!)

So for the past couple of days I have been working various ideas for handmade gifts for him and I ran past a very interesting blog post about what is cheaper...buying vs making toys. Check out the post here---> Whileshenaps Also while you are there please check out her handmade patterns for toys! LOVE THEM!

I understand that buying toys can be really cheaply done with stores like walmart and dollar stores etc... However there is something magical about receiving and making a handmade gift! It’s something that the recipient will know you put thought and time into... and time anymore... is priceless...(you can’t buy time at walmart...trust me I have tried)....

So as I go back to looking for cute patterns I think we all should stand outside of walmart with handmade gifts and stop people from making a horrible shopping mistake by going in :)

A couple Cute Patern Ideas I'm in Love with at the moment!!

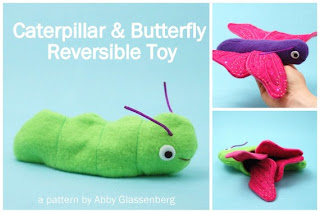
We have been reading The Hungray caterpillar alot lately.
 My lil guy is very interested in how a caterpillar turns into a butterfly!

A stuffed superhero! Need I say more!
How handsome would ANY lil boy be in this hat!!!!!!

Sunday, June 10, 2012

For things stuffed and such!

Rule of Life #502
Try to personalize everything!
Down to the simplest little things that you use..
 everything needs your own flare!

Often when making blankets and stuffed objects I use a chopstick to turn the corners or add stuffing etc... a simple stick...how boring.....
some polymer clay and 30 minutes later I give you... PANDA ON A STICK! (Sounds like delicious fair food doesn't it!!!) oh and a tutorial :-)

He was very simple to make and here is a quick tutorial on how to make on of your own...or just how to make a Panda to add to other things around the house :D if you don't want to make one but would like one of your own I have him listed here Panda on ETSY
No Pandas were harmed in the making of this project!

Need:
One package of black and white Polymer clay.
A chopstick often found in your local grocery store.
a knife
a needle
and clean hands!

1.Take a small piece of white clay about the size in the picture
2. Roll into a ball making one end slightly more pointed for the nose.
3. Next take two very small round black balls
4. Roll one into a tube for the ears
5 & 6.. Slightly Squish the two ends together to make
ears do same to other ear.
7. Squish both ears on the pandas head like so.
8. Take another small ball of black clay and flatten
 it out and add to the end of the nose area.
9. Take the back end of a paint brush and make
 indents for the eyes.
10. roll out two small black balls
11. Squish the little black ball very flat with your digits.
12. Press the flatten end balls into the indented
eye sockets :D

13. Make a black ball shape about the same size as the head.
14. Roll out the ball into a long tube for the arms.
15. using your digits make little paws by pinching the end of the tubes
16. Score the under side of your panda head and the pandas arms.
If you have any liquid sculpey apply a dot on the under side
of the head as if it were glue. If you do not have any liquid
sculpey just score really good and press the head onto the arms.
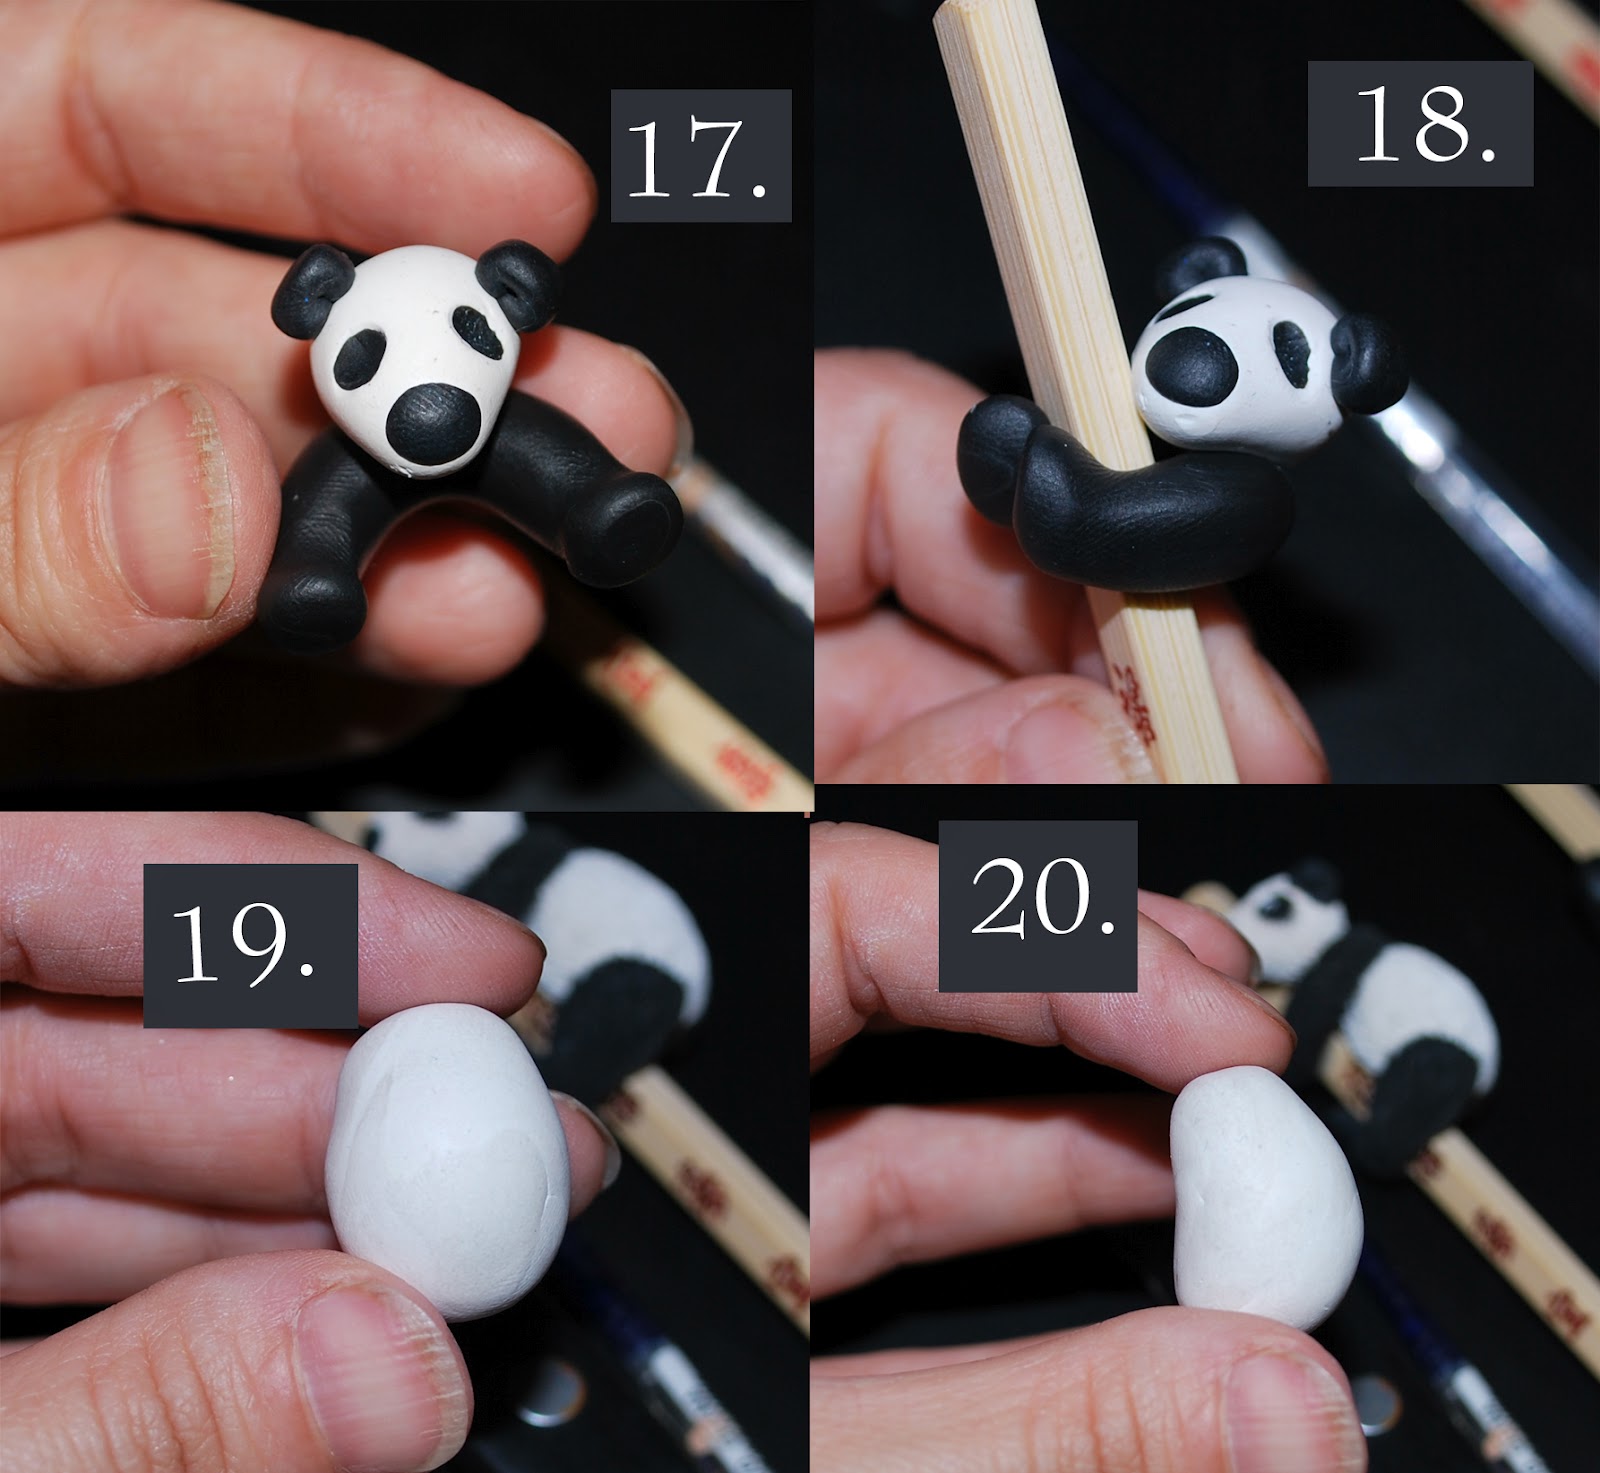
17. How it looks at this point kinda cute already huh!!
18. take your chop stick or stuffing stick and wrap the
pandas legs around it and press slightly so he stayed put
19. roll and a large white ball for the body
20. roll the ball into you get a shape like so score the
 top part of the body and the under side of the arms and
stick the body to the arms


21.Roll out two balls for the legs
22.Roll on of the balls between your fingers until you
get a leg shape and do the same with the other ball.....at
this point I realize i forgot to take a picture of how to make
the mouth. Basically I took the knife I have been using for
scoring and I poked it in to the mouth spot and pulled down
to make a open mouth shape.
23. score the under side of the legs with your knife and apply
the legs to the body. Use liquid sculpey if you have some
24. so right now you have a cute non fuzzy panda... however
this guy needs some fuzz! take your pin or needle and start
 scoring all over start at the back of the neck and score the
colors together...go all the way down the back.


25. scoring down the arm
26. I worked on the face last make sure to score the black
spots in the eyes..
27. bake your panda at 275 for 20 minutes ...its ok to bake
 the stick...after he is cool I painted the eyes and
28. DONE!